

Simplify Your Move-Out Cleaning with This Ultimate Guide
June 13, 2025
Key Highlights for Move-Out Cleaning
- Get a quick summary of essential move-out cleaning strategies, from reviewing your lease agreement to ensuring your security deposit is protected.
- Maximise efficiency in the cleaning process with the right cleaning supplies, including eco-friendly options like white vinegar and baking soda.
- Discover practical decluttering and packing ideas to make your moving process stress-free and organised.
- Use our detailed move-out cleaning checklist to tackle every room in your old home, ensuring it’s left in excellent condition.
- Learn how to approach final inspections with your landlord to meet specific conditions and secure your deposit refund.
- Focus on areas that require special attention, like light fixtures, baseboards, and bathroom fixtures, for a spotless finish.
Moving can be a lot to handle. You need to pack up your belongings, get everything organized, and prepare to settle into your new home. Before you move to your next place, it is essential to leave your old home looking clean and tidy. If you clean well, you will likely have your landlord or next home owner happy, and you have a better chance of getting your security deposit back. You can choose to hire a cleaning service or you can do the cleaning yourself. Either way, you need the right tips and tools to make the cleaning process feel less complicated and easier to get through. When you start on your moving journey, choose to leave your old home spotless.
Essential Preparations Before You Start Move-Out Cleaning
Cleaning your old home starts with good planning. Take time to get ready. Before you pick up the mop, take a moment to review your lease agreement. Check with the landlord to determine what they want you to do. Knowing this can save you time and help you avoid last-minute issues and complications with security deposits or the new homeowners.
Get all your cleaning supplies before you begin. Ensure you have the necessary items, such as microfiber cloths, mops, vinegar, and baking soda. This makes the cleaning fast and simple. If you set up well, this moving process will go better. Good cleaning and getting ready will help you move into your new home with less stress.
Review Your Lease Agreement and Landlord Expectations
Begin by reviewing your lease agreement. This is the paper where your landlord wrote down the rules for moving out. You need to check for things related to cleaning and repairing any damage. If it says your place should be in its original condition, you may have to do some cleaning, patch holes, or maybe paint some walls.
Talk with your landlord next. Ask them what they would like to review during the inspection. See if they already have a cleaning checklist ready. It's good to ask about these things early. This can help you and your landlord understand each other. It may also help you avoid problems and additional costs associated with your security deposit.
Remember, your security deposit is essential. You usually get this money back if you remove stains and clean everything so it looks great. Take another look at your lease—sometimes you need to give special attention to details like baseboards, grout, or light switches. Focus on these areas if the checklist indicates them. If you do these things, you have a better chance of meeting the landlord’s needs and keeping your money safe.
Gather the Necessary Cleaning Supplies
Get your cleaning supplies ready before you start the move-out cleaning process in your old home. Having all the necessary items before you begin will make cleaning much easier, so try shopping for these items at least a week or two before your move-out day.
- Glass cleaner: Use this on windows, light fixtures, and mirrors. It gives a nice shine without leaving streaks.
- Microfiber cloths: These are great for cleaning in general; they will not scratch delicate surfaces and can absorb a lot of dust or liquid for quick clean-ups.
- Broom and mop: Clean your floors well by sweeping and mopping. This way, no dirt or other mess will stay behind.
- Use the power of white vinegar: White vinegar is a natural and safe cleaning solution that is environmentally friendly and helps eliminate mold, grime, and stains. It's also effective for cleaning appliances, such as washing machines, and for helping to disinfect clothes and pet bedding. Just be sure to run an extra rinse cycle.
- Baking soda: You can pair baking soda with vinegar to help clean tough stains or remove unpleasant odors from areas like sinks and washing machines.
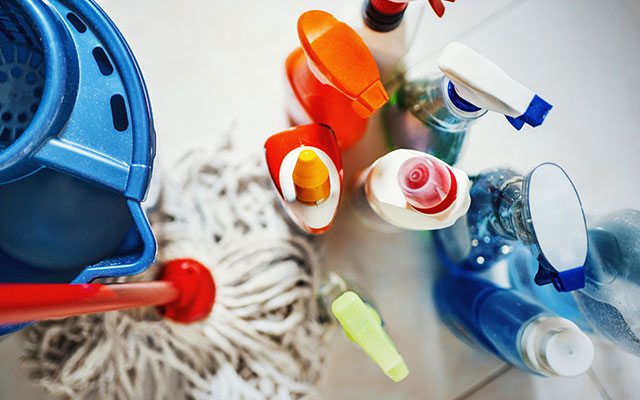
Keep all your cleaning supplies in one place to make the cleaning process faster and easier. Try to use items like washable clothes, so you don't generate a lot of waste. When you have what you need, you can do a good job and make your old home clean for the next people.
Decluttering and Organizing Your Belongings
Packing should always begin with getting rid of things you do not need. This is a smart way to carry less, and it helps make the moving process easier. Before you put anything in boxes, take a moment to review your belongings. Sort them into piles. Decide what you want to keep, what to donate, and what to throw away.
There are some things you may only use during certain seasons, or items that hold a special meaning for you. For these, think about using storage facilities. These places can keep your belongings safe and help you avoid cluttering your new home. When you declutter first, you make the job of moving and packing much easier. It helps the move go well and helps you settle in faster.
Separate Items to Keep, Donate, or Discard
Organizing your belongings prior to your move can help make the cleaning process less stressful and smoother. There will be some issues with trying to move and clean at the same time, but if you start packing rooms early and organize your stuff while doing so, you can clean as you go. Try using these techniques to begin organizing your belongings:
- Create distinct piles: Sort your belongings into separate piles, such as “keep,” “donate,” and “discard.” This can help you know what to do with each item.
- Donate usable items: Give clothing, kitchenware, and books that you do not use to someone who needs them. This is beneficial for others and also helps you reduce the amount of stuff you need to pack and take with you.
- Discard damaged goods: If you have items that are broken or falling apart, dispose of them. Do not take them to your new home to create more of a mess there.
- Consider storage facilities: You may want to store large furniture or items that you only use seasonally in storage facilities. This keeps your space at your new home open and neat.
- Focus on sentimental value: If you have decluttered effectively and reduced the amount of stuff you need to take with you, then you will easily be able to make allowances for bringing sentimental items with you, even if you don't use them very much.
By organizing your stuff and packing early, you will be able to clean more easily as you go. It also makes moving day much easier, as the majority of your belongings will already be packed, and the items you no longer need have been donated or discarded.
Efficient Packing Tips for a Smooth Move
Packing your things well needs some planning and good organisation. Here’s how you can make it simple:
- Allow yourself plenty of time: Be sure to start packing some weeks before moving. This will help you avoid all the last-minute stress.
- Categorise by room: It is a good idea to pack each room on its own. You should label each box with what’s inside and which room it is for. This will make unpacking in your new house much easier.
- Use protective materials: To keep your belongings safe, wrap things like glassware with bubble wrap or microfiber cloths.
- Leverage lightweight storage bins: For heavier items like books or cookware, use sturdy yet lightweight storage bins. This will help your things not break on the way.
- Pack day one bag or box: One of the best things you can do for yourself and your family is to pack a box or suitcase with the essentials you'll need for the first night or day in your new home. That way, you have everything you need for that first overnight without having to unpack everything. Pack these items last so they are the first thing you unpack at your new home.
If you pack your belongings by using these easy steps, moving into your new house will go much better. You will save time, and it will help you settle in more quickly.
Whole-Home Move-Out Cleaning Checklist
A whole-home cleaning is essential to make your landlord or new homeowners happy and to restore your old home to its original condition. After all, you would want whoever lived in your new home to prepare it correctly for you! Begin with our cleaning checklist and move from top to bottom. Start with ceiling fans, light fixtures, and areas that require special attention, such as baseboards and grout.
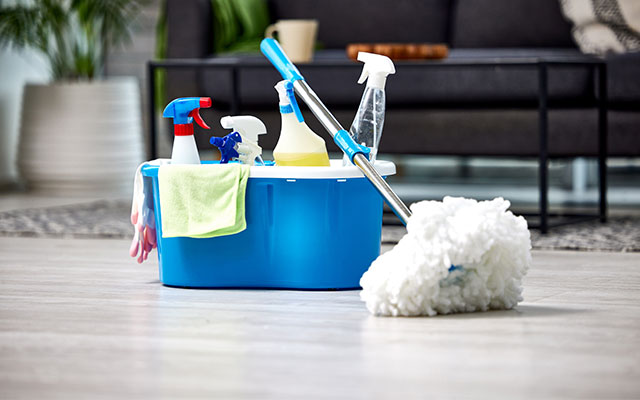
Allow sufficient time to clean every room thoroughly, especially the kitchen and bathroom. You should use a simple cleaning process, such as clearing out clutter first, dusting, and providing extra cleaning where needed. Use the checklist as you go, and your old home will be clean and ready for inspection. This will make things so much easier when you move out.
Dusting and Wiping Down Surfaces
Remove dust and stains from all surfaces to make your rental look neat and polished in no time:
- Start with high surfaces: Begin by using a duster or a microfiber cloth to clean both ceiling fans and light fixtures. There will also be dust bunnies and dust webs up on the crown molding and corners of your rooms. Use a vacuum with a telescopic hose to clean these spots easily.
- Clean the countertops: Use eco-friendly cleaners such as white vinegar. This will help you avoid streaks, resulting in a smooth finish without having to use a harsh chemical cleaner.
- Clean window panes and sills: Use a high-quality glass cleaner (there is a noticeable difference between cheap and standard glass cleaners) to clean both the inside and outside of your home's windows. They'll look spotless and let in more natural light.
- Address neglected areas: Sometimes, grime builds up on surfaces that people touch frequently, such as light switches and door frames. Wipe these thoroughly and clean them again using disinfecting wipes.
Cleaning Walls, Baseboards, and Doors
Walls, baseboards, and doors get a lot of focus during landlord inspections, so you want them to look their best:
- Inspect walls for stains: Check the walls for any visible stains. If you see marks, use a paste made of baking soda and water to help with cleaning, or have a can of touch-up paint handy to spot-treat.
- Restore baseboards: Dust and clean baseboards with a damp cloth or duster to pick up dirt and dust.
- Wash exterior doors thoroughly: Take the time to wash your exterior doors thoroughly - this can be done with a standard cleaner or a pressure washer. If you opt for the pressure washer route, be sure to prevent any water from entering or compromising the integrity of the door itself.
- Clean trimwork: The parts around frames can get dirty. Use a microfiber cloth for cleaning here to be more exact.
- Repaint or patch walls: Restore your old home's walls to their original condition by patching nail holes and touching up the paint where necessary for cleaning or repairs. If you are renting your old home, most landlords will not release your security deposit back to you if you leave nail holes and other damage to the wall unpatched.
Doing all these will give the home a neat and good look. This will also help you meet the landlord’s expectations.
Deep Cleaning the Kitchen
When it comes to home cleaning, the kitchen is often the most challenging part of the entire cleaning process because of the way you naturally use it. There will be food bits, grease, and general grime and dust buildup from the constant use. Start by scrubbing the countertops, sinks, and cabinets. You need to clear off all the grime in these spots. Give special attention to the appliances you are leaving behind. Clean them both inside and outside so they look and feel fresh.
After that, tidy up the floors. Ensure that storage spaces are clean and free from any mess. If you clean the kitchen this way, you help make the rental look its best for the last inspection. This will help leave the place in excellent condition.
Cleaning Appliances Inside and Out
Make sure your kitchen appliances look great by using these easy cleaning tips:
- Fridge - Remove all the shelving and drawers from the refrigerator and clean and dry them in a tub or outside. Scrub the inside walls and shelves with a mixture of baking soda and water, then dry thoroughly. Wipe the doors and handles well.
- Microwave - Although it may be messy, cleaning a microwave naturally is a simple process. You can mix one cup of water, one tablespoon of both vinegar and lemon juice in a microwave-safe dish and heat it for 2-3 minutes until it boils and produces steam on the inside. After it cools, wipe the inside and outside to clean the grime. Remove the glass turnstile, clean it thoroughly, and let it dry.
- Dishwasher - Clean the rubber seals, filter, and door with some detergent. Then run one empty cycle with vinegar inside to freshen it, or use a dishwasher-safe cleaning product recommended by your dishwasher manufacturer.
- Stove/Oven - Use a paste made from soda and water to scrub the top and racks. Clean the exhaust fan filters as well. If you have a glass top range, you can purchase cleaners specifically for degreasing and removing tough stains.
Work on removing grime and odors. These steps help keep your fridge, microwave, dishwasher, and oven clean, looking new, and working well.
Sanitizing Cabinets, Countertops, and Sinks
Thoroughly clean all kitchen surfaces to make them look better:
- Cabinets: Take out everything. Remove crumbs and dirt. Wipe the doors inside and outside.
- Countertops: Scrub away stains by mixing lemon juice and baking soda. This helps in restoring the surface.
- Sinks: Use white vinegar to clean and sanitize. Focus on the faucets and drains to remove built-up grime.
- Tap handles: Polish any chrome finish by using an eco-friendly glass cleaner.
If you use tools like microfiber cloths, the kitchen will shine. It will be ready for tenant inspections.
Move-Out Cleaning for Bathrooms
Bathrooms need deep cleaning to pass an inspection. Start with cleaning the toilet bowls and move on to the mirrors. You should clean every fixture and surface thoroughly. Pay close attention to the grout, tub drains, and areas where mold may be present to achieve a seamless, finished look.
Use bleach-based cleaners with other eco-safe cleaners; however, ensure that you have good airflow in the bathroom and turn on the fan for ventilation, as bleach odor can become dangerous over time. Don’t forget to go over the bathroom floors and polish all the hardware. This will give your bathrooms a thorough cleaning, ensuring that the next occupants walk into a clean environment they can call home immediately.
Scrubbing Tubs, Showers, and Toilets
Sanitize bathroom essentials using efficient techniques:
- Deep clean toilet bowls: Add bleach to the bowl, let it sit for a few minutes, then scrub thoroughly. Use disinfectant wipes to clean the rest of the toilet.
- Grout and drains: Use a paste made of baking soda to remove grime to clean up dirt and potential mold spots before they continue to grow.
- Shower fixtures: Clean and polish chrome fixtures with vinegar. Wipe them dry with a cloth.
- Tub surfaces: Spray a cleaning solution over the entire tub and wipe or scrub the tub and shower thoroughly to remove any buildup or grime that can accumulate over time.
- Under sink areas: Remove any toiletries you no longer need and wipe the shelves to keep them clean.
If you take care of these main areas of use, your bathroom will look fresh and clean.
Polishing Mirrors, Fixtures, and Floors
Add shine to your bathroom by paying attention to the minor details:
- Mirrors: Use a fog-free glass cleaner to achieve a clear, streak-free look. Don't skimp on a cheaper kind of glass cleaner, as they can leave ugly streaks behind.
- Fixtures: Clean your taps and showerheads well by wiping them down with vinegar and drying afterwards.
- Bathroom floors: Mop the tiles or flooring using soapy water or a premade cleaning solution to get them clean and shining.
- Light switches: Clean them with a damp cloth to keep them clean.
- Vent covers: Dust these areas thoroughly so you prevent dirt and dust from accumulating and damaging the fan.
When you polish surfaces, the bathroom not only looks better but also functions better. This makes it cleaner for everyone and ready if you need it checked.
Final Touches and Inspection
Complete your move-out cleaning process by attending to the small finishing tasks that help maintain the home in excellent condition. Perform a final check yourself, or ask your landlord or realtor to inspect the area and provide feedback. Devote time to fixing, patching, and cleaning any areas that have not been addressed yet.
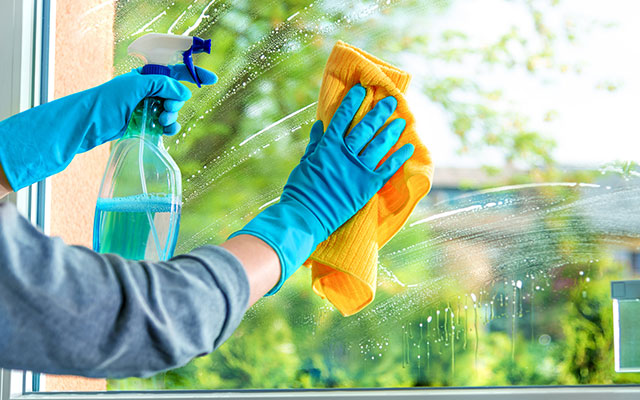
Review your lease agreement if you have one to ensure you understand the specific conditions for moving out. Take care of things that require last-minute attention, such as faded paint spots or any marks on the furniture. Doing these things shows that you care and are responsible. It helps make the moving-out process smooth and fosters a positive relationship with your landlord upon departure.
Addressing Repairs and Minor Touch-Ups
Handle lingering issues with precision:
- Patch holes: Fill any small holes made by nails with spackle. After it dries, sand the area until it is smooth, and then apply paint to cover it entirely.
- Repaint where needed: This isn't meant for you to go all out painting, as that can take a long time to do. This is more about spot-checking around your home for any places where paint is peeling or has been scuffed. Try to match everything so that it looks as close to the original condition as possible.
- Fix loose hardware: Ensure that light switches, cabinet handles, and door hinges are tightened securely.
- Polish furniture: If your home or apartment was pre-furnished, be sure to fix any scuffs or blemishes on the furniture pieces. Use products specifically designed for this job and exercise caution when using them.
- Replace bulbs: Test all fixtures. Swap out old light bulbs to keep everything working for the next person.
These quick steps can go a long way in making the inside of a home look more inviting and clean. It can also mean the difference between getting your security deposit back from a landlord or having issues at closing, so it just makes sense to take care of it now.
Let 1-800-PACK-RAT Make Your Move Out Easier
Whether you do the cleaning yourself or hire a professional cleaning company, it can be a time-consuming process, regardless. And when you're moving, the last thing you need to worry about is choosing between using your time for cleaning or packing and moving out. With 1-800-PACK-RAT, you can make your move-out happen on your terms and timeline.
We achieve this by bringing moving solutions directly to you. While traditional moving methods involve renting a large moving truck, packing it, driving it, and unpacking all in a single day, 1-800-PACK-RAT has helped change that formula. Here's how it works: we will drop off a portable moving container at your home, which you can pack at your own pace and keep for as long as you need it. When you are finished packing, we will pick it up and transport it to your new home, or we can store it in one of our 80+ nationwide secure warehouse locations for as long as you need. It is that simple.
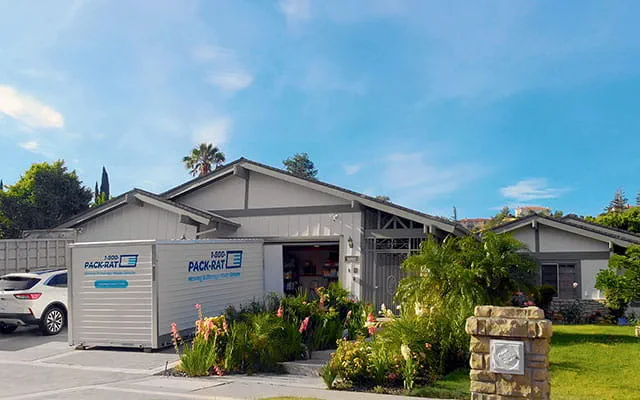
No matter if you are moving locally across town or moving long-distance across the country or need on- or off-site storage, our containers are tailor-made to help make your moving and storage needs simple. Give us a call today and let us make the worries about timing and doing everything in one day a thing of the past! Get a free quote now to get the process started with 1-800-PACK-RAT!
Frequently Asked Questions About Move-Out Cleaning
What are the most commonly missed spots during move-out cleaning?
Often, people forget to clean areas like ceiling fans, light switches, baseboards, window sills, and the grout that is between tiles. Make sure you look at little corners and spaces that are out of sight, because dust and dirt can build up there over time.
How long does a thorough move-out cleaning take?
A thorough cleaning can take a considerable amount of time. You may need about two to five hours. The time it takes depends on the size of your place and its current level of cleanliness. Using a cleaning checklist is an effective way to streamline the cleaning process and make it more efficient. A cleaning service can also save you a significant amount of time and ensure the job is done thoroughly.
Is it better to hire a professional move-out cleaning service?
If you have the money to spend and don't have the time to clean properly, then yes, hiring a cleaning service can be extremely helpful. The people who do the cleaning know where to pay special attention to and have the tools to do so, such as carpet cleaning in the living room and bedrooms. They make sure your place is so clean that you have a good chance of getting your security deposit back. Consider using this service if you don't have time or want to save effort.
Can I deduct cleaning costs from my security deposit?
Check your lease agreement to see the details. Some landlords will deduct cleaning costs if you leave the place in an unclean state. If the cleaning rules are listed clearly, tenants should ask questions to know what is expected and how to avoid any extra fees. If you are selling a home, the new homeowners might raise issues with the house's cleanliness at closing, which could cause delays in selling your home.
What eco-friendly cleaning options are available?
Try eco-friendly cleaning methods, such as using white vinegar, baking soda, and lemon juice. These cleaners can help remove grease, stains, and unpleasant odors. They do a good job and cause minimal harm to the environment. This is a great way to handle move-out cleaning. You can use a combination of white vinegar, lemon juice, and soda for tough stains while cleaning.
- Moving Tips (133)
- Home Organization (27)
- News Releases (23)
- Packing Tips (21)
- Fun Stuff (19)
- Portable Storage (17)
- In the Community (11)
- Moving and Storage Tips (11)
- Storage Tips (11)
- Moving Checklists (9)
- Household Moving (7)
- Moving Company Comparisons (5)
- Moving on a Budget (5)
- DITY Move (4)
- Home Maintenance Tips (3)
- Home Buying and Selling Tips (1)
- Interstate Moving (1)


